Moab: The ultimate multi-day itinerary for arches and petroglyphs
Many visitors to Moab, Utah visit Arches National Park and Canyonlands National Park but miss some of the amazing arches and petroglyphs that are outside of the parks. This multi-day itinerary to Moab includes time within the National Parks as well as some of the amazing sights outside of the parks. These are my recommendations for a multi-day trip to Moab to experience numerous arches and petroglyphs.
This post contains affiliate links. If you make a purchase through one of these links, I may receive compensation at no extra cost to you. Thank you for your support.
Arrive in Moab and hike to Morning Glory Arch
If you are able to arrive in Moab early in the day, I would immediately head over to the Grandstaff Trail and hike to Morning Glory Arch. This trail is approximately 4.3 miles roundtrip, but has minimal elevation gain, making for a somewhat short hike. There are a few points where the trail is slightly hard to find or requires some scrambling over rocks. Despite the lack of elevation gain there are some challenging stretches. You can also see the hike profile and read trip reports on AllTrails here.
The Morning Glory Arch at the end of the trailhead is spectacular. There is also a spring that feeds a small creek next to the arch, which is pretty cool to see in the Utah desert. If you want a more adrenaline-fueled experience, you can book a canyoneering tour and rappel down into the canyon from the top of Morning Glory Arch. Depending on the time of the year and runoff, there are several places you might have to make a water crossing, so be prepared to walk through water on some parts of the trail. You can find out more about canyoneering tours and rappelling from Morning Glory Arch here. You can also see more amazing tour options here.
Views of Morning Glory arch from just off to the side 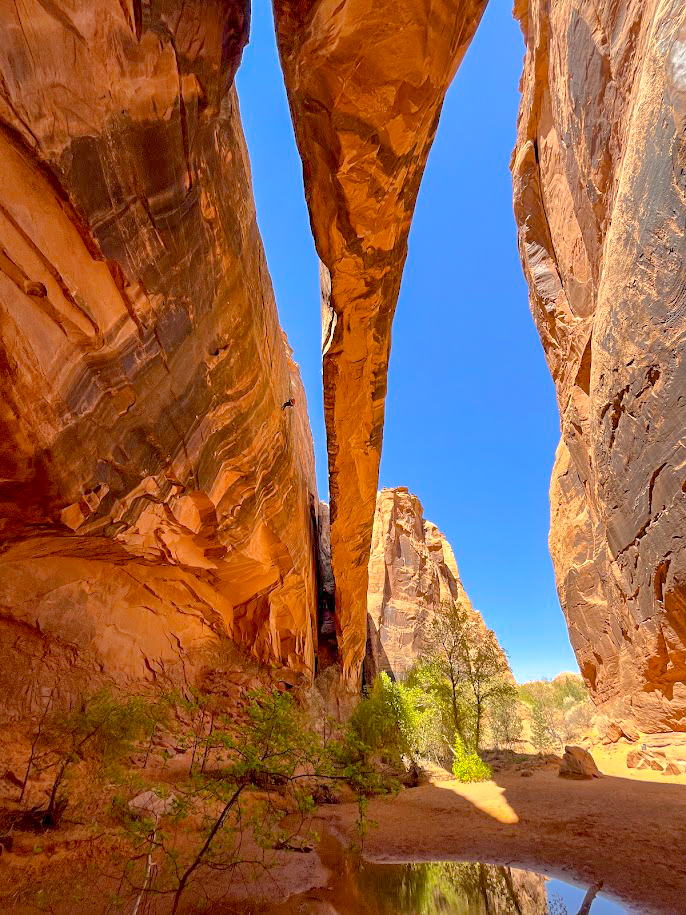
Views of Morning Glory Arch from beneath the arch
Grab lunch then hike to Potash Road Dinosaur Tracks, Petroglyphs, and Longbow Arch
If you managed to hike to Morning Glory Arch in the morning, you should still have time to hike to the Potash Road Dinosaur Tracks and Petroglyphs and Longbow Arch. All of these sites leave from the same trailhead so you can leave your vehicle at the same parking area. The dinosaur tracks are really neat to see especially since there is an interpretive sign that explains them. From the dinosaur tracks, it is a short hike to an impressive rock art panel with numerous intriguing petroglyphs.
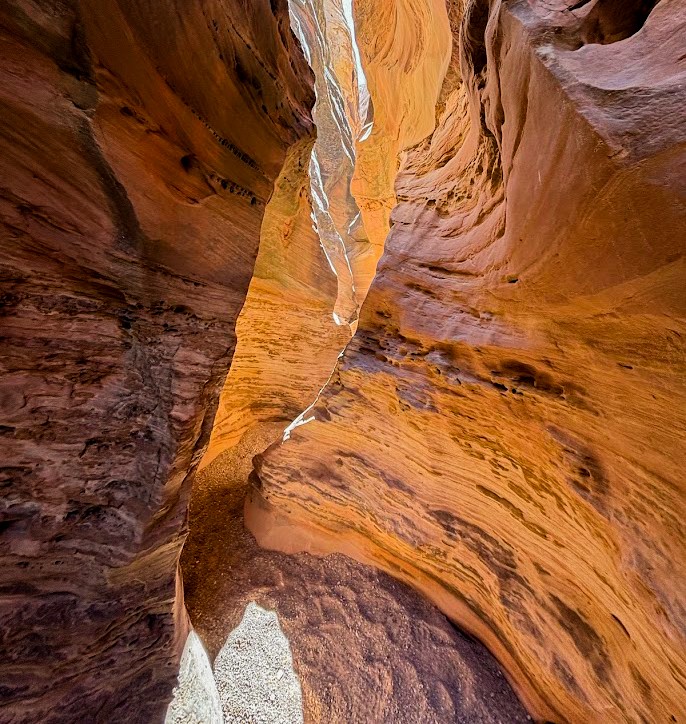
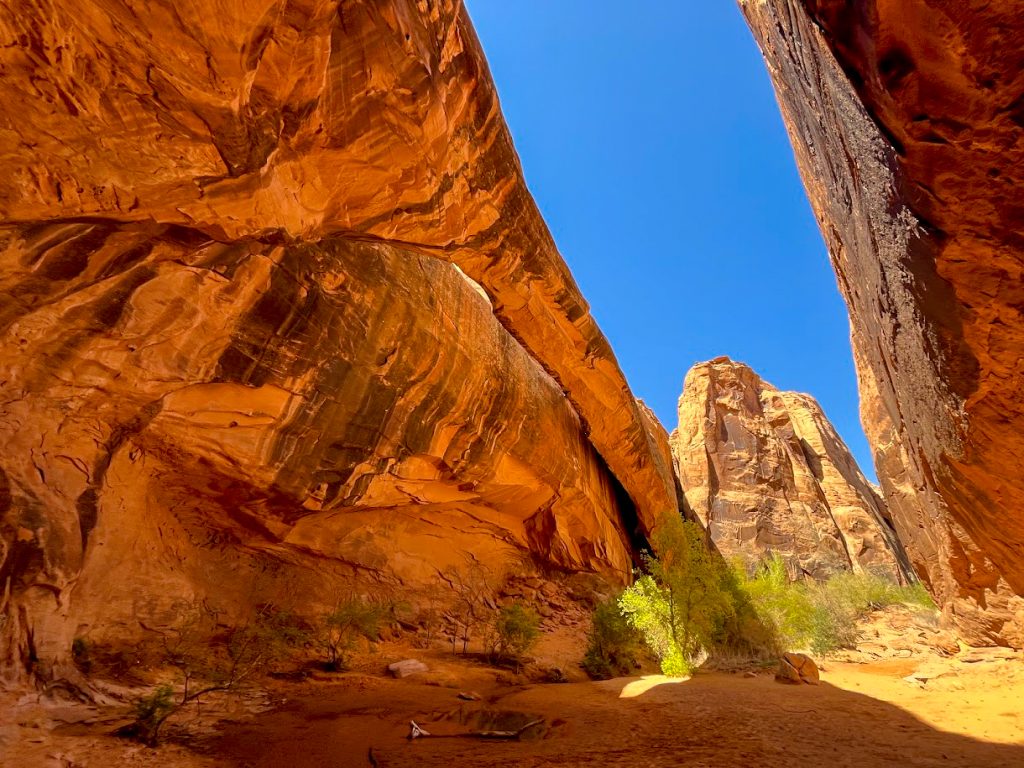
After viewing the dinosaur tracks and the petroglyphs, you can continue to Longbow Arch. There is one stretch of trail that requires using some rebar rungs drilled into the rocks, but this is a short stretch. You then walk along the tops of sandstone hills and through deep sandy stretches that are somewhat challenging to walk through. The arch is tucked between two canyon walls and is worth the trek through the sandy areas. When I hiked this trail, there were only a few other people on it. It was a good, secluded hike away from the crowds of other hikes around Moab.
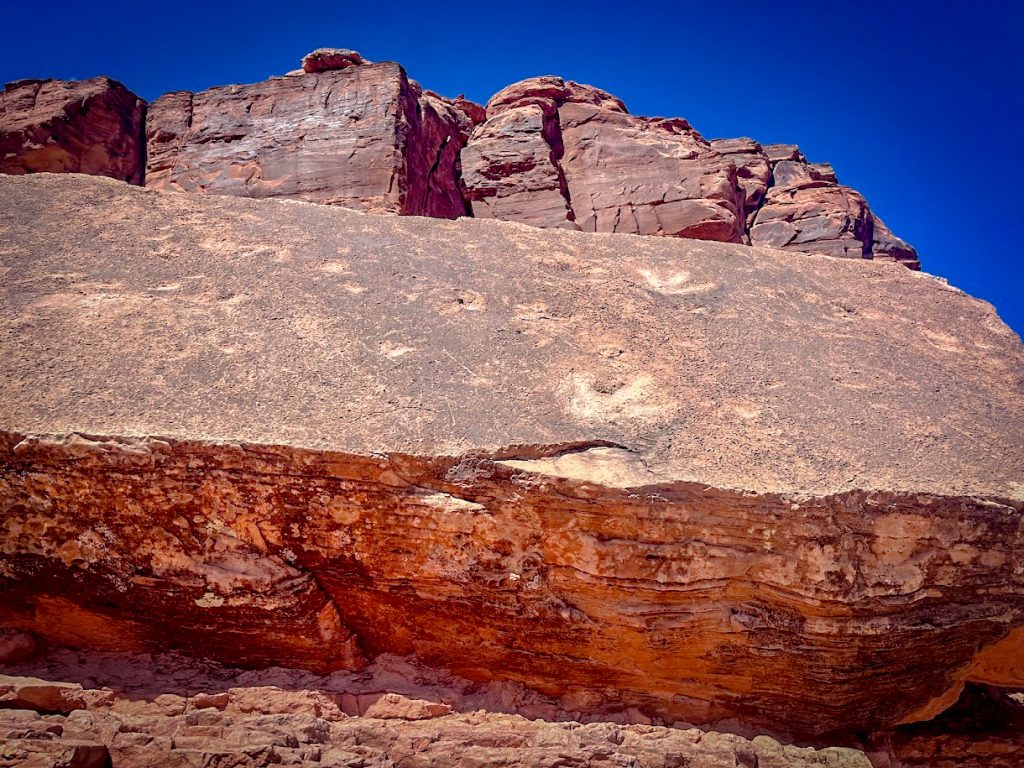
Before or after this hike, be sure to spend some time viewing the many petroglyphs on Utah Highway 279. Signs along the road designate the many petroglyph areas, so it is hard to miss. Many of these petroglyphs are incredibly high up above the road base. I could not help but wonder if the riverbanks used to be higher before the road was constructed or if the Native Americans who created them used ladders or some other form of scaffolding to create the panels. After viewing the petroglyphs, I would head back to town for dinner and to get ready for another long day of hiking the next day.
 Some of the dinosaur tracks visible on the Potash Road Dinosaur and Petroglyphs Hike
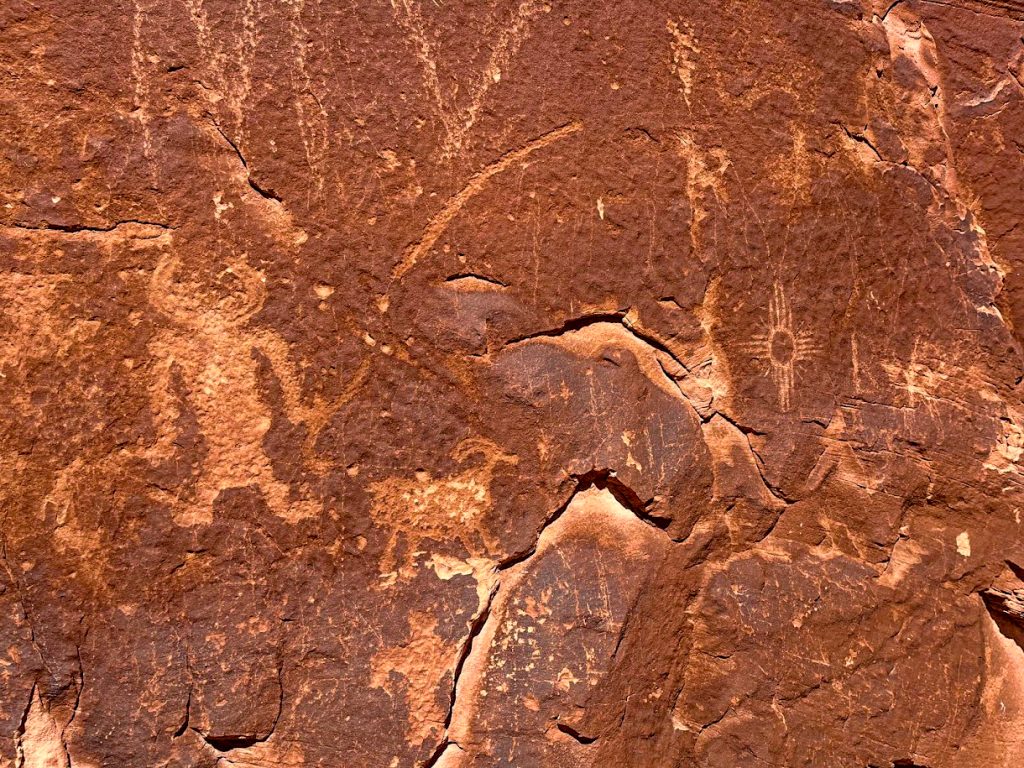 Some of the interesting petroglyphs on the hike
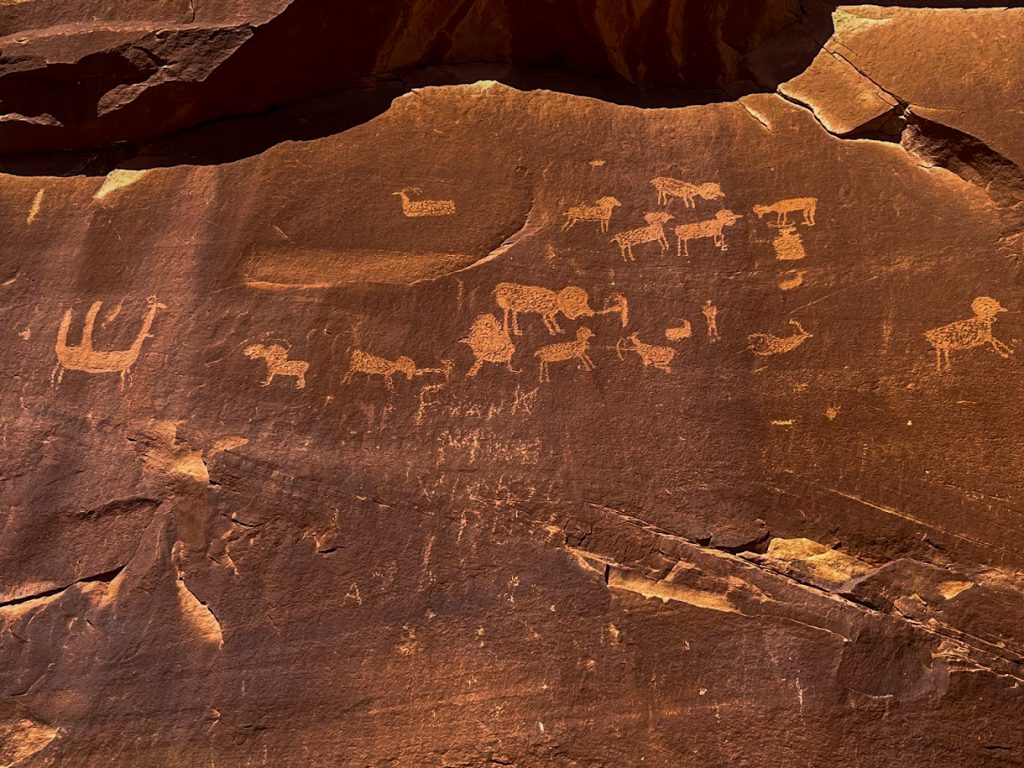 More interesting petroglyphs along the hike
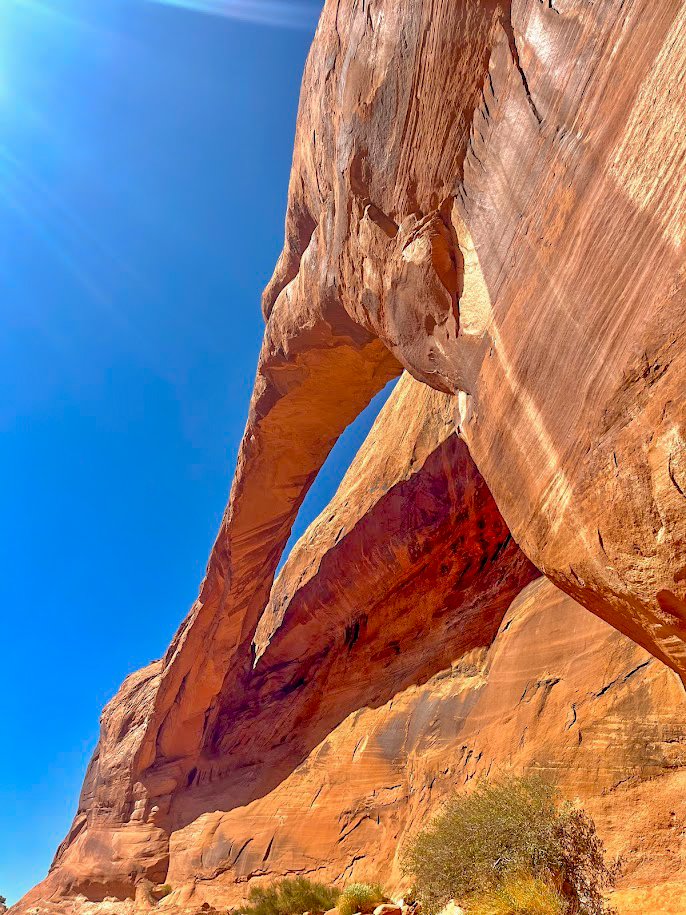 Views of longbow arch from beneath the arch
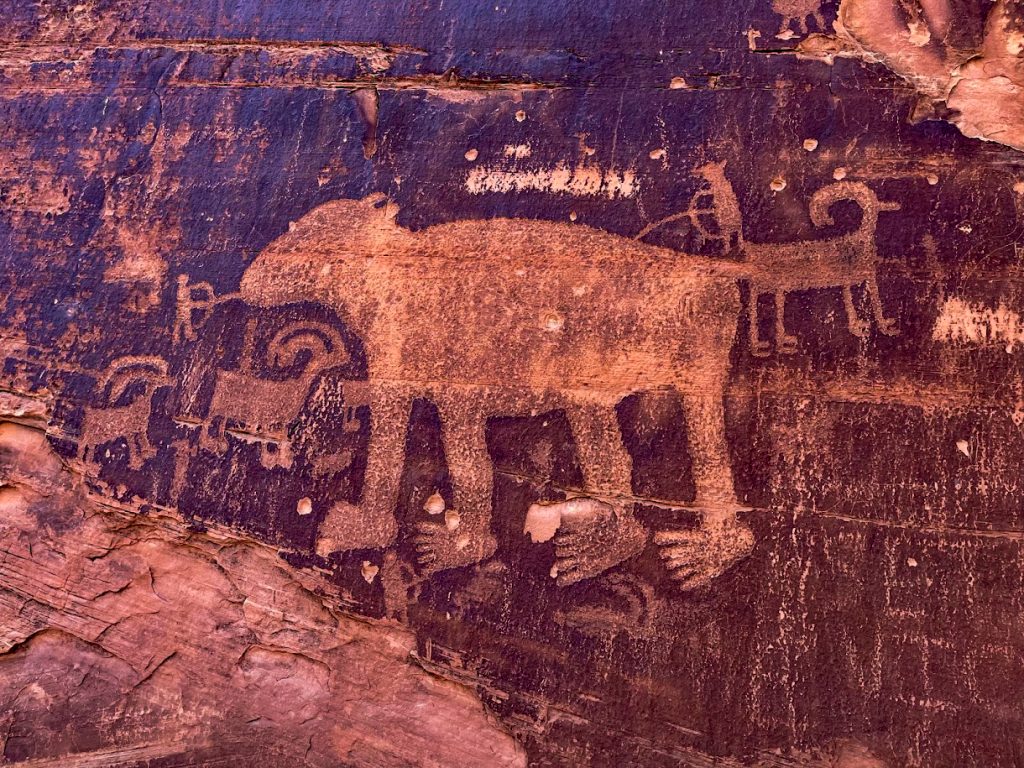 Some of the amazing petroglyphs just off the road as you head towards Potash Road
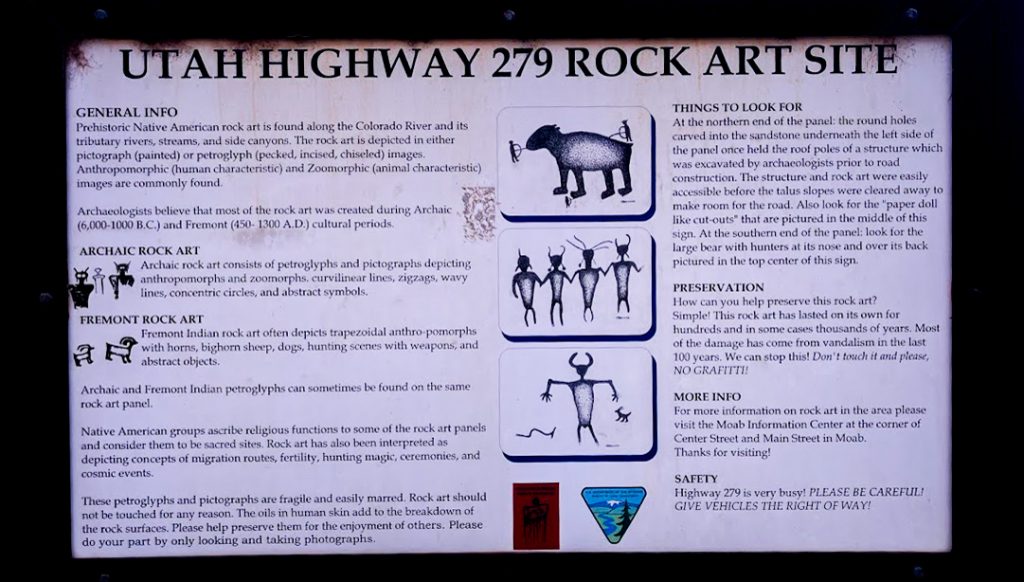 Utah has done a great job providing interpretive signs for many of the petroglyphs in the area
Head to Arches National Park for the day
Be sure to get your timed entry permits to Arches National Park for your visit. The earlier you can enter the park the better so you can check out numerous sites and hike multiple trails. You can also enter the park prior to the beginning of timed entry for the day. If you are an early riser, this is a great opportunity to photograph Delicate Arch at sunrise. If you do not have tickets for Fiery Furnace on this visit, these are my recommendations.
Delicate Arch
The first site I would head to on your visit is Delicate Arch. The last time I visited, I had the earliest timed entry permit for the day and still barely got one of the last parking spots at the Delicate Arch trailhead. This trailhead is very busy as this is possibly Utah’s most famous landmark. Delicate Arch is so famous that it is the arch featured on Utah license plates. The freestanding arch is truly an impressive site. Delicate Arch is the largest freestanding arch in the park. According to the National Park Service, the opening below the arch is 46 feet high and 32 feet across.
The hike to the arch is also a really neat hike. You go past an old homestead cabin as well as past some Native American Petroglyphs. You then hike up a long sandstone hill before wrapping around some other sandstone features and finally getting a look at the beautiful arch. The trail is just three miles roundtrip with an elevation gain of 480 feet. Despite that distance, do know that the trail becomes incredibly hot in warmer months and people have died from heat related illnesses on this hike. Bring plenty of water and sun protective clothing and consider hiking this trail early in the morning or late afternoon and not in the heat of the day.
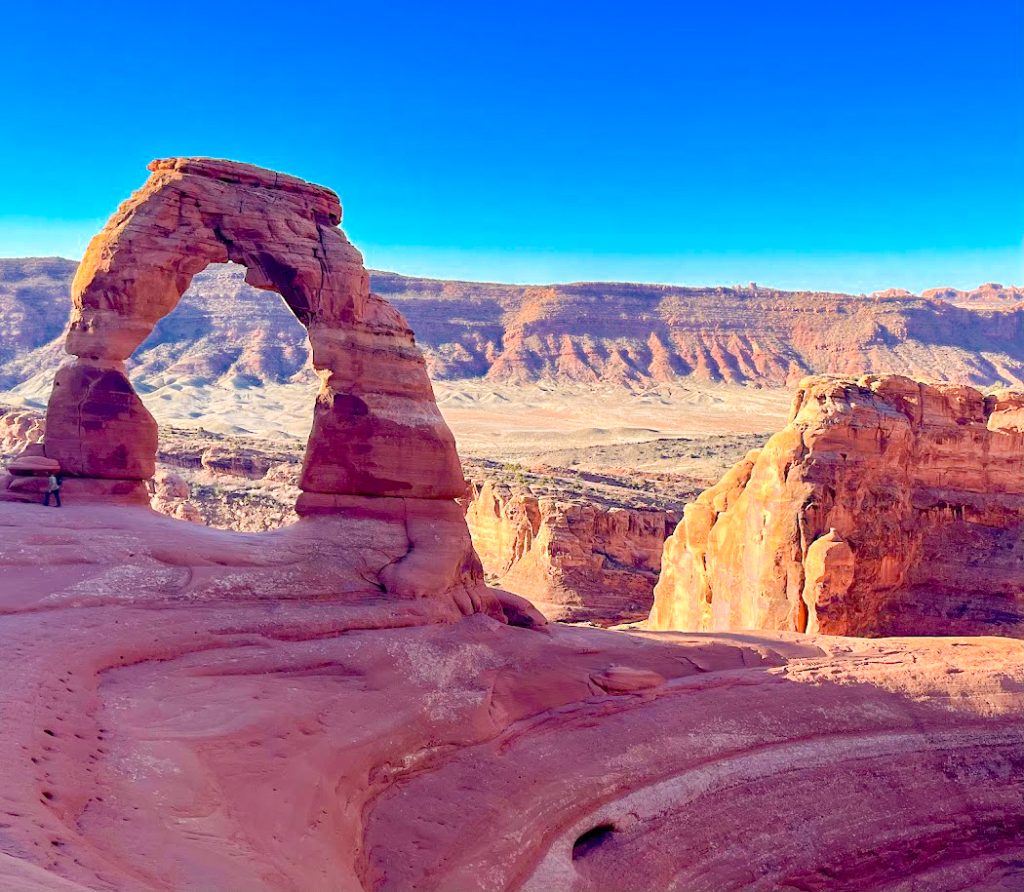 Views of the amazing Delicate Arch
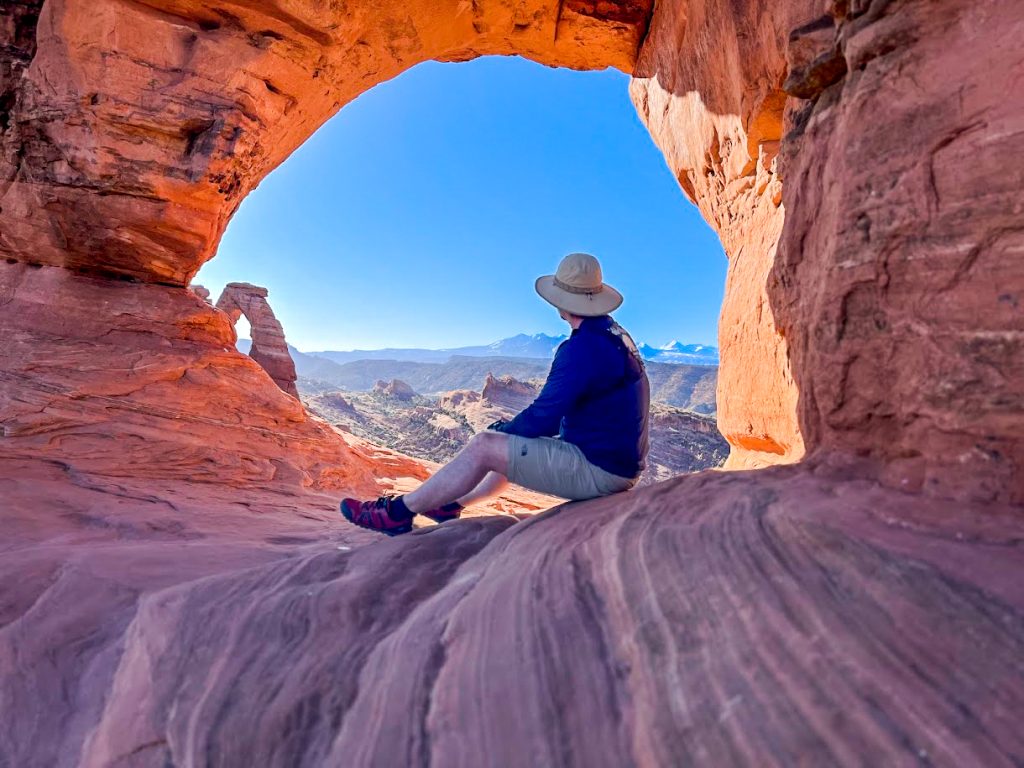 You can even view delicate arch through the vantage point offered by another arch
Devil’s Garden and possibly Devil’s Garden Primitive Trail
If you are an avid hiker and are not tired from the hike to Delicate Arch, I would recommend heading over to Devil’s Garden to hike the Devil’s Garden Trail. This trail passes numerous other famous arches that should not be missed on your trip to Moab. From this trailhead, you can visit Tunnel Arch, Pine Tree Arch, Landscape Arch, Partition Arch, Navajo Arch, Double O Arch, Private Arch and more. You can also hike out to Dark Angel, which is a massive monolith in the middle of the desert.
Those seeking an easier hike might just go to the famous Landscape Arch and head back to the parking lot. This would be a quick hike of about two miles. Those looking for a challenging hike should consider doing the entire Devil’s Garden Loop and adding on the Devil’s Garden Primitive Trail. If you hike all of the spurs and out to Dark Angel, this trail is around eight miles roundtrip. The Primitive Trail requires advanced route-finding utilizing rock cairns, scrambling up and down steep sections of sandstone, and dropping off several drop-offs of four to six feet high. This is not an easy hike at all and is not recommended for anyone afraid of heights or that does not trust their balance on steep sandstone. It is not recommended if it is wet or icy as there is a great potential for slipping and falling.
Should you hike this loop, bring plenty of water, sun protective clothing, and sunscreen. I would also recommend downloading a map of the trail that does not require cell phone service prior to this hike since the route finding is challenging in some areas. You can find additional information about this hike on the National Park Service website here.
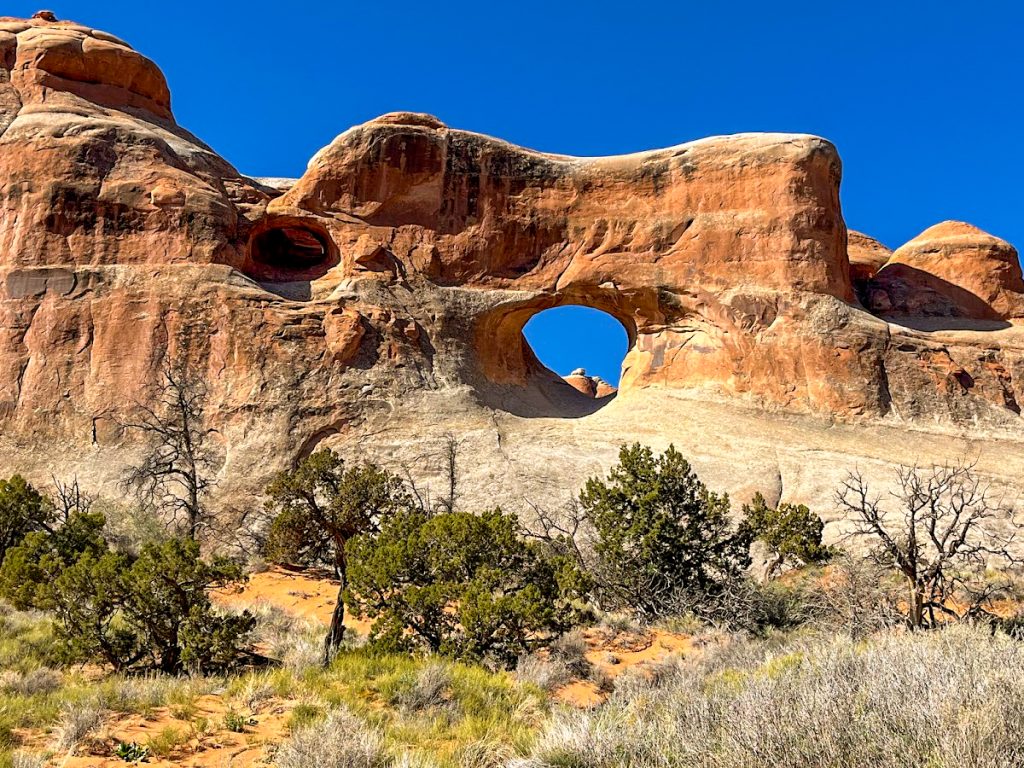
Tunnel Arch is the first arch you will come across on the Devil’s Garden Trail 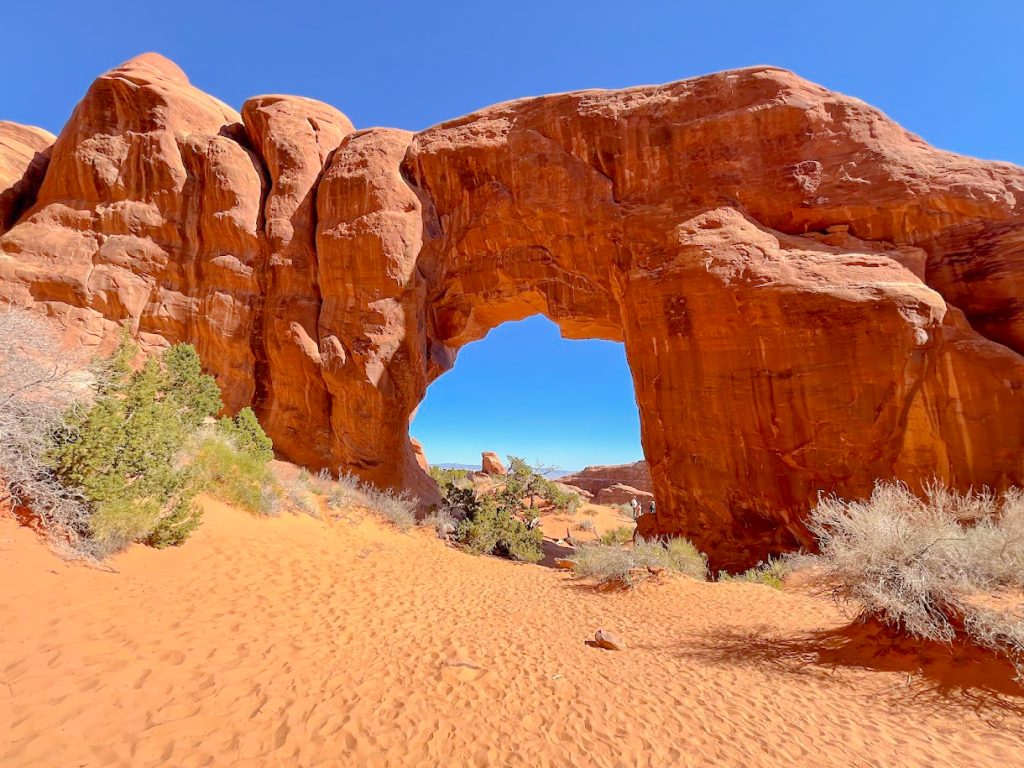
Pine Tree Arch is aptly named for the pine tree growing under the arch 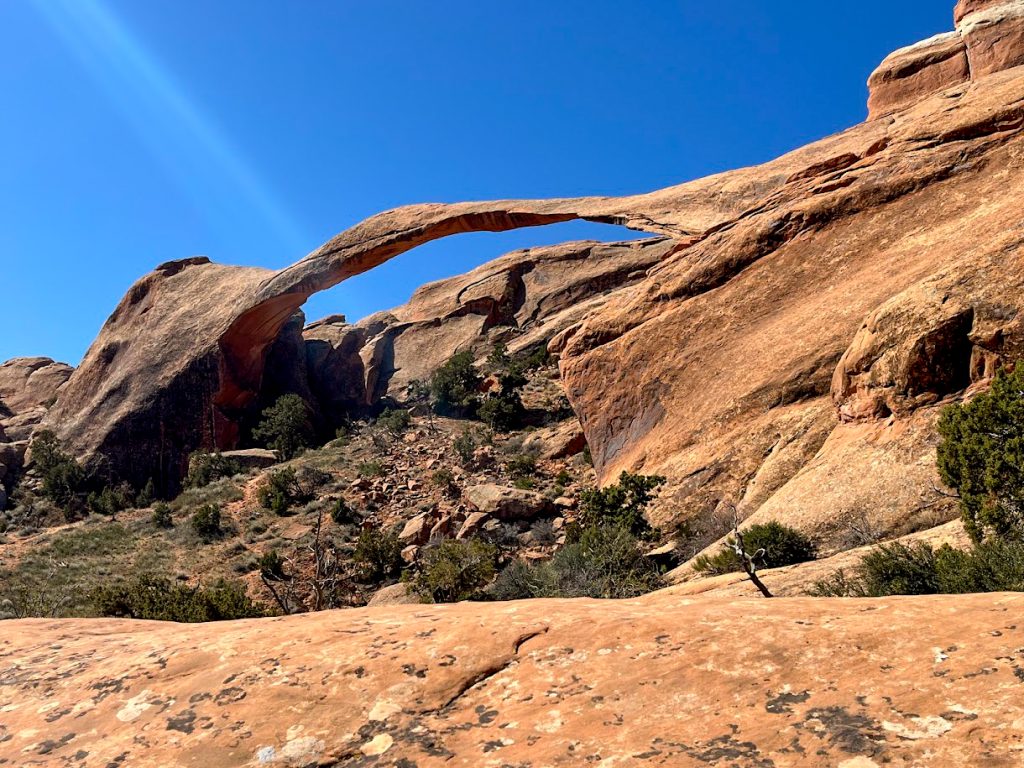
Landscape Arch is the longest arch in North America. It spans an amazing 306 feet. 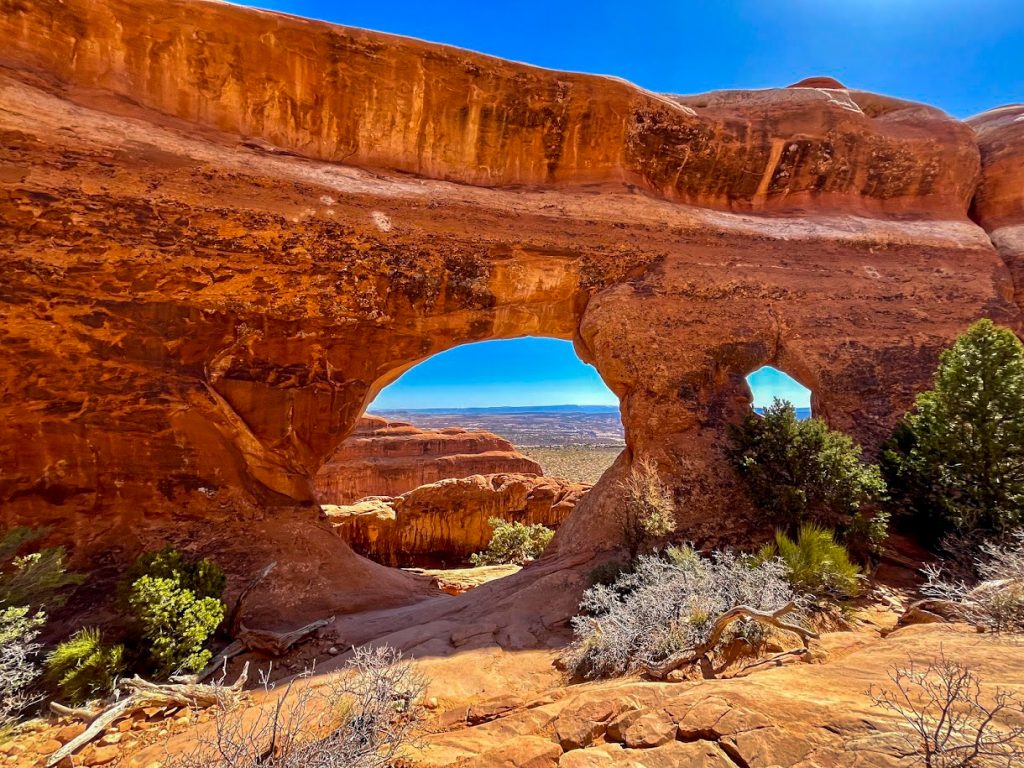
Be sure to take the side trail to Partition Arch as well 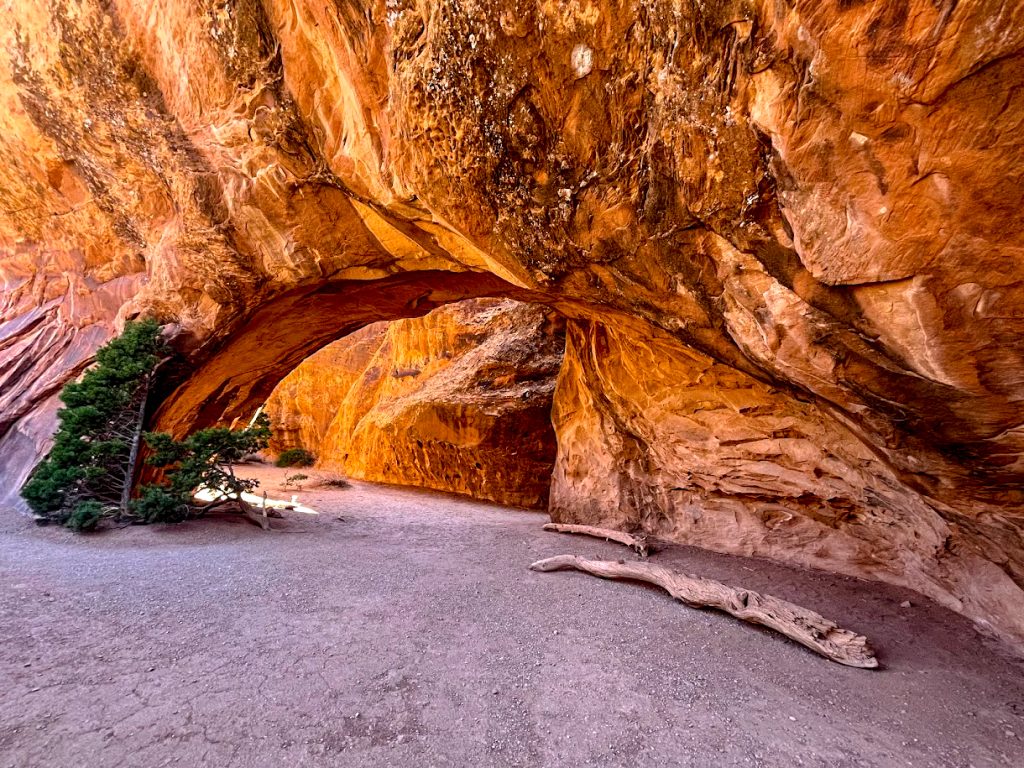
You can visit Navajo Arch from the same side trail as you took to get to Partition Arch 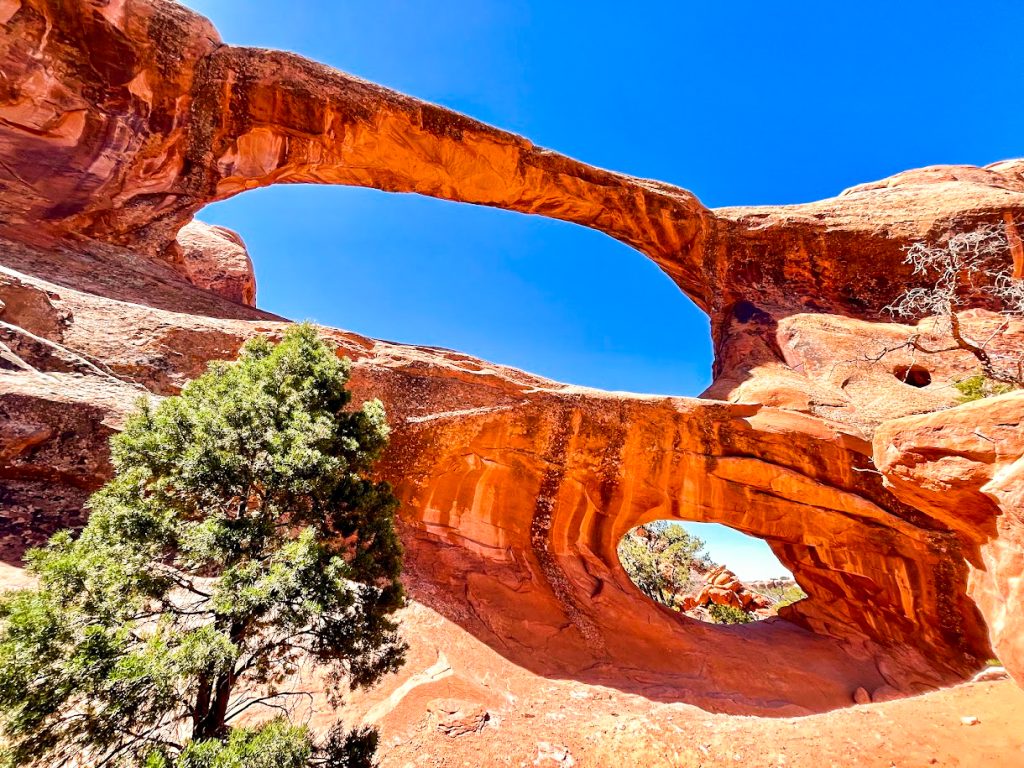
Double O Arch makes a good turn around point for those not wanting to hike the Devil’s Garden Primitive Trail. Turning around here would be an approximately 4.2-mile roundtrip hike. 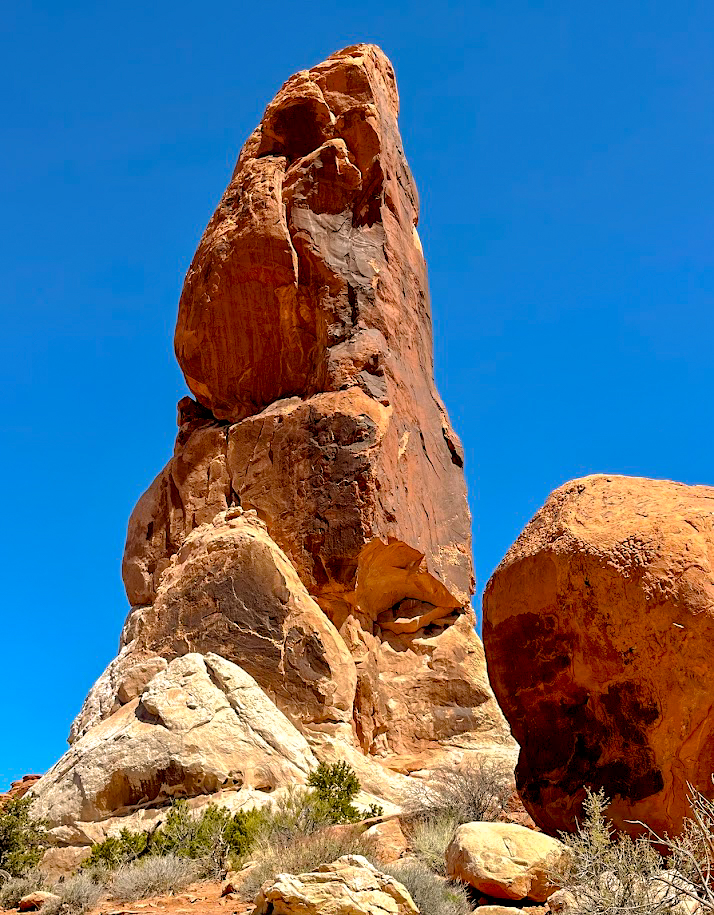
Dark Angel is an approximately 150-foot-tall monolith that juts out from its desert surroundings.
Sand Dune Arch and Broken Arch
While in the vicinity of Devil’s Garden, you should stop at Sand Dune Arch and Broken Arch trailhead. You can visit both of these arches from the same parking area and should definitely do so if you still have some energy left after hiking the Devil’s Garden trail. Sand Dune arch is located between towering sandstone formations, making it a unique arch that is hidden away between these rock formations. You also walk through soft sand to reach the arch, which makes for a fun hike but will also feel quite exhausting if you just got done hiking the Devil’s Garden Loop.
From Sand Dune Arch, it is a short hike over to Broken Arch and back. This is another neat arch to visit as you can walk under the arch and take photographs from both sides of the landmark. If you hike to Broken Arch and back, it will add an additional 2+ miles to your day, so keep that in mind if you have already done a lot of hiking. For more information about these arches, you can visit their page on the National Park Service website here.
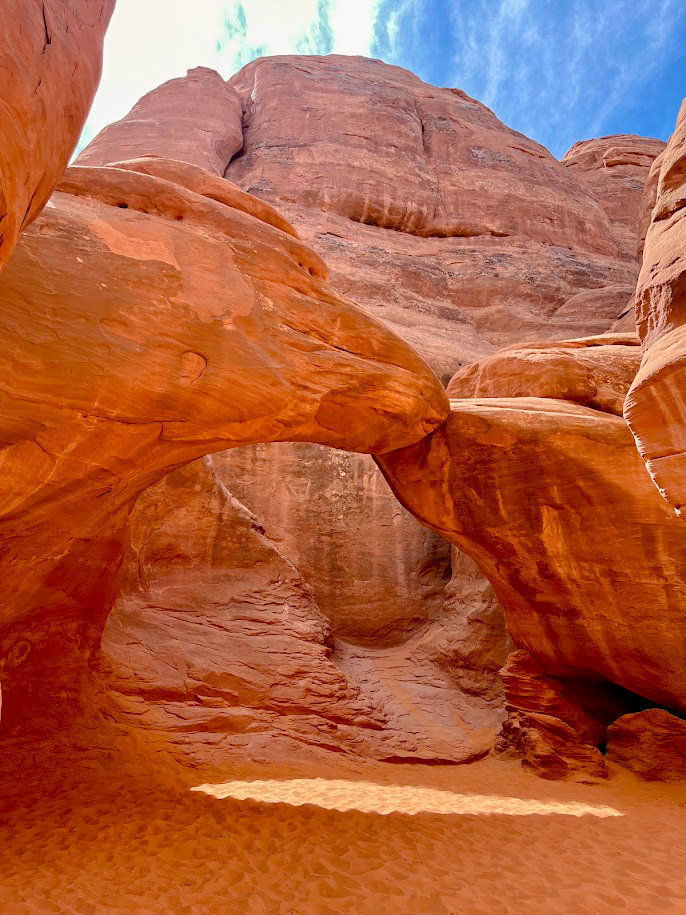 Sand Dune Arch is a really neat arch that is tucked away between towering sandstone formations
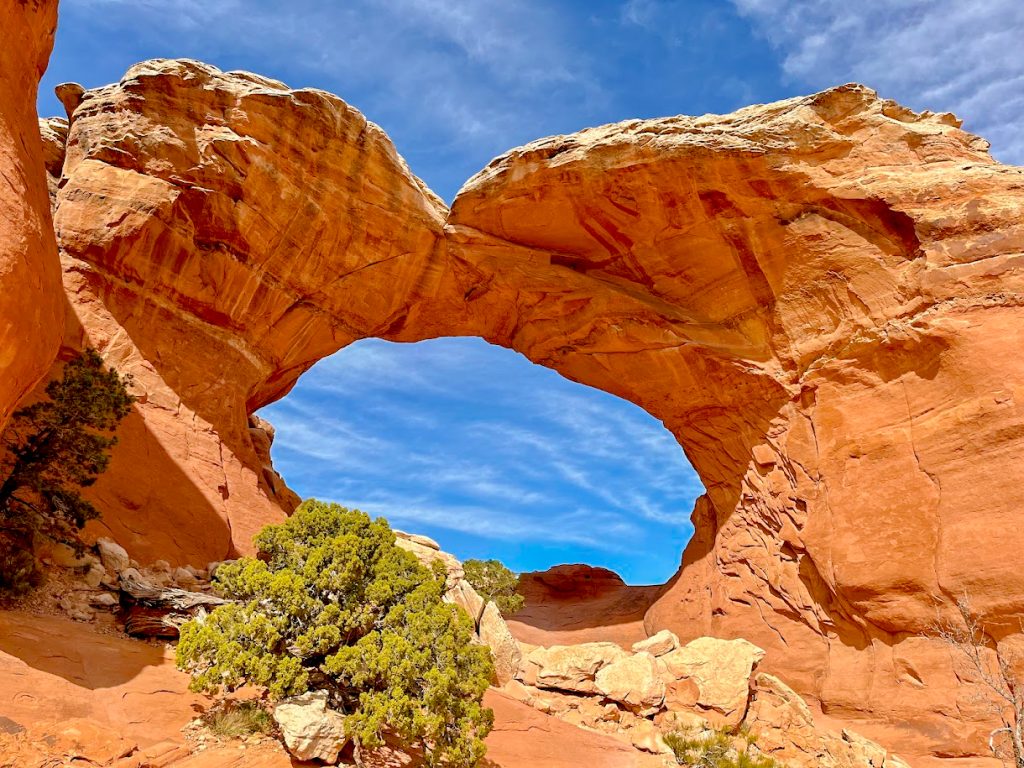 Broken Arch is accessible from the same trailhead as Sand Dune Arch and is worth the slightly over 2-mile hike
Go back to Arches National Park to visit additional sites
If you spent a day hiking the different hikes I mentioned, you will probably run out of time to check out some of the other famous arches in the park. If that is the case, I would recommend heading out from Moab early in the morning again and heading to Balanced Rock Viewpoint and the Double Arch and Windows Trailheads. You definitely need to see these famous sites and arches on your trip to Moab. The trails to each of these sites are quite short, so you can check out each of these landmarks fairly quickly before continuing on about your day.
Balanced Rock
You can see Balanced Rock from the main road that runs through Arches National Park, but it is worth stopping at the viewpoint and potentially even hiking up to the landmark. If you walk out to the rock formation, it is a simple 0.3-mile roundtrip hike from the parking area. Balanced Rock stands 128 feet tall and is worth stopping to take some photographs. Due to erosion, Balanced Rock will not always be standing, so be sure to take the opportunity to view this impressive landmark while you are in Moab.

Double Arch and Windows Trailheads
When most people think about Arches National Park they probably think of Delicate Arch, Landscape Arch, and Double Arch. Double Arch is absolutely stunning and is the tallest arch in the park. It stands at 122 feet tall and is awe inspiring. You can see the arch from the parking lot, but it is completely worth making the short 0.6-mile roundtrip walk to stand beneath the arches and get an up-close look at how immense they are.
From this same parking area, you can also see North Window Arch and Turret Arch. These are also worth the short hike to view up-close before continuing on with your day. If you have followed my itinerary to this point, I would recommend leaving the park next and going to visit Corona Arch and Pinto Arch.
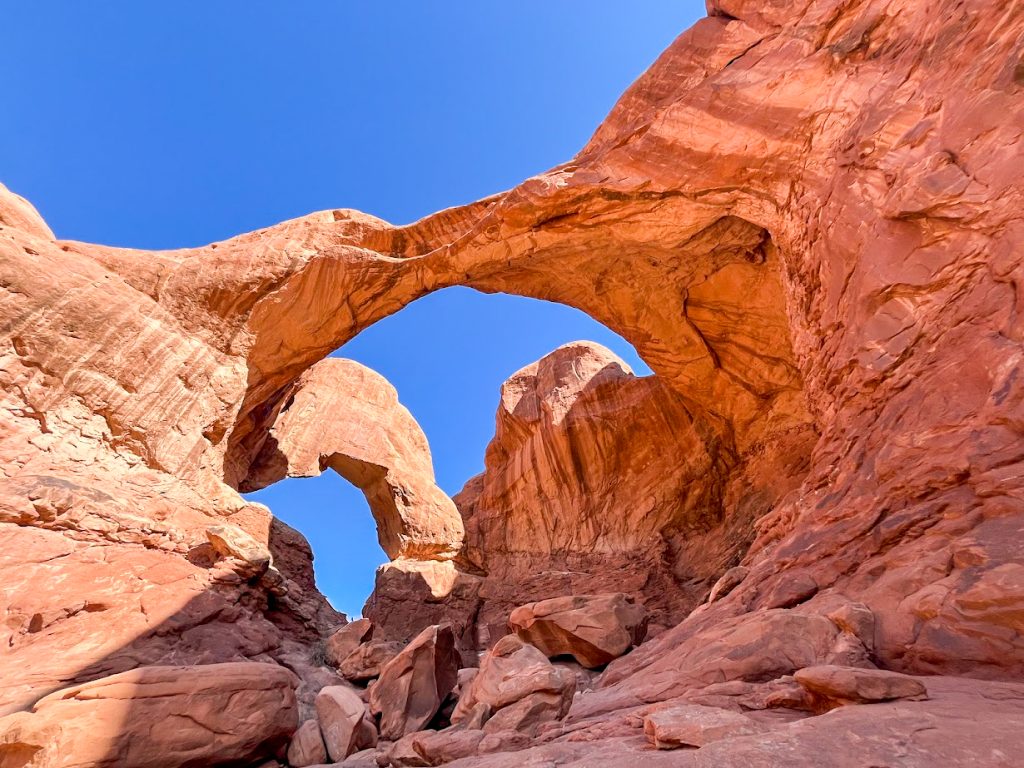 Double Arch might be the most impressive arch in the entire park
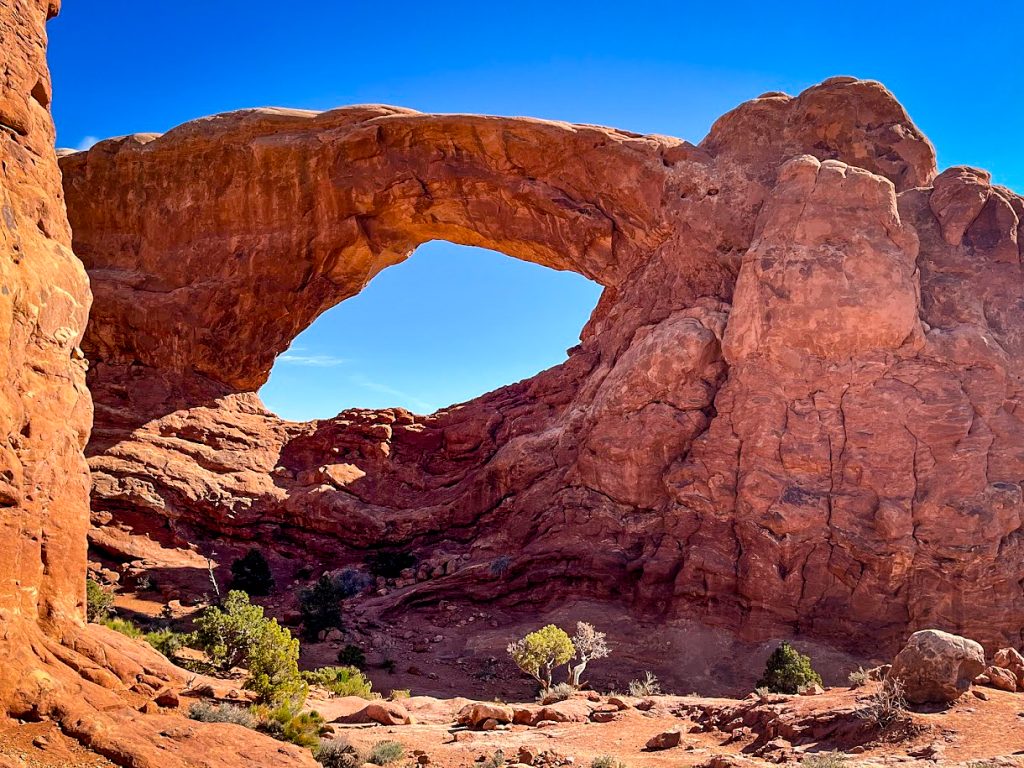 North Window Arch can be accessed from the same parking area as Double Arch
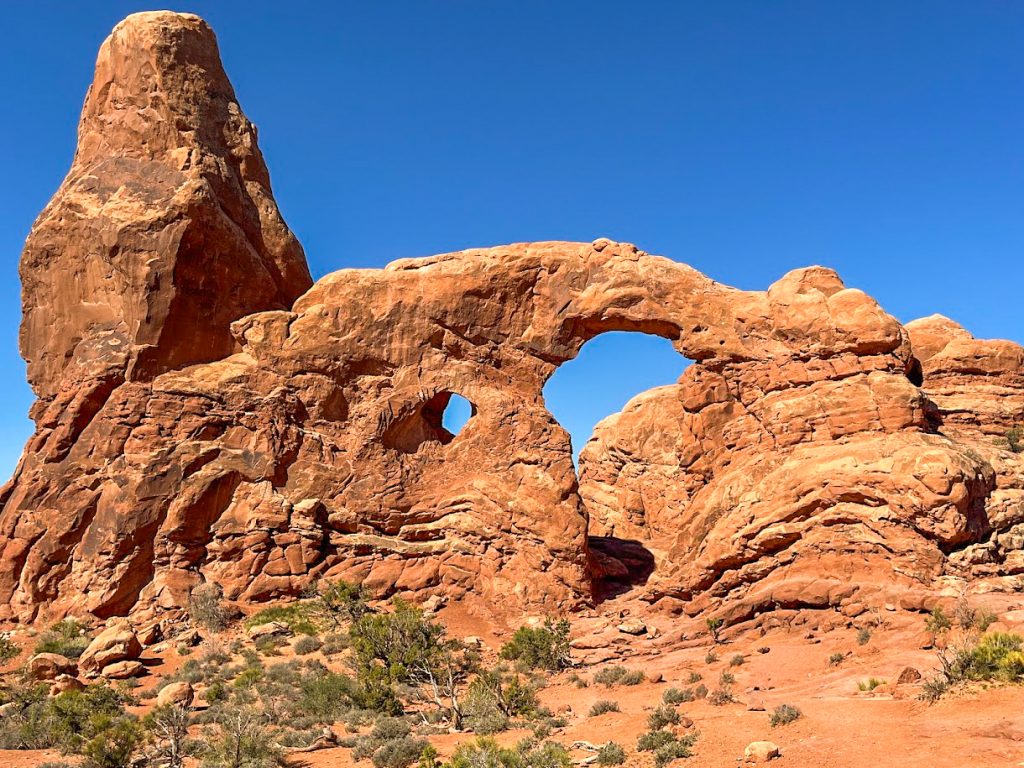 Turret Arch is just a short hike away from North Window Arch, so you can visit multiple arches within a short hike of one another
Head to Corona Arch, and Pinto Arch before visiting Canyonlands National Park and Dead Horse Point State Park
Corona Arch and Pinto Arch
To reach these arches, take Utah Highway 279 west of town. This scenic road follows the Colorado River and passes numerous pictograph panels that are worth seeing if you did not stop when you visited Longbow Arch. You will access Corona Arch and Pinto Arch from the same parking lot. You do not need to purchase a pass to hike to these arches. A lot of people hike to Corona Arch and bypass Pinto Arch, but I think Pinto Arch is also worth the visit.
The trail to these arches begins with stretches of moderate incline before leveling out. To get to Pinto Arch, you go up another moderate incline before walking across a flat stretch that leads to the arch. To reach Corona Arch, you ascend a steep stretch where you hold onto chains that are drilled into the rock and also climb a metal ladder. These stretches are quite steep, so be mindful of your footing and take your time in these areas.
Once you are past the chains and ladder, it is a relatively simple uphill hike to Corona Arch. You also pass Bowtie Arch before reaching Corona Arch. After taking photographs of Bowtie Arch, it is a short trek to Corona Arch. Corona Arch is a really impressive arch that sticks out from the surrounding sandstone cliffs in striking fashion. I recommend taking photos from both sides of the arch as they both give you a neat perspective. When I visited, I hiked to Corona Arch first and then Pinto Arch on the way back to my car. I do not think you can go wrong visiting them in this order or in the reverse order. I just think both are worth visiting as long as you are hiking this trailhead.
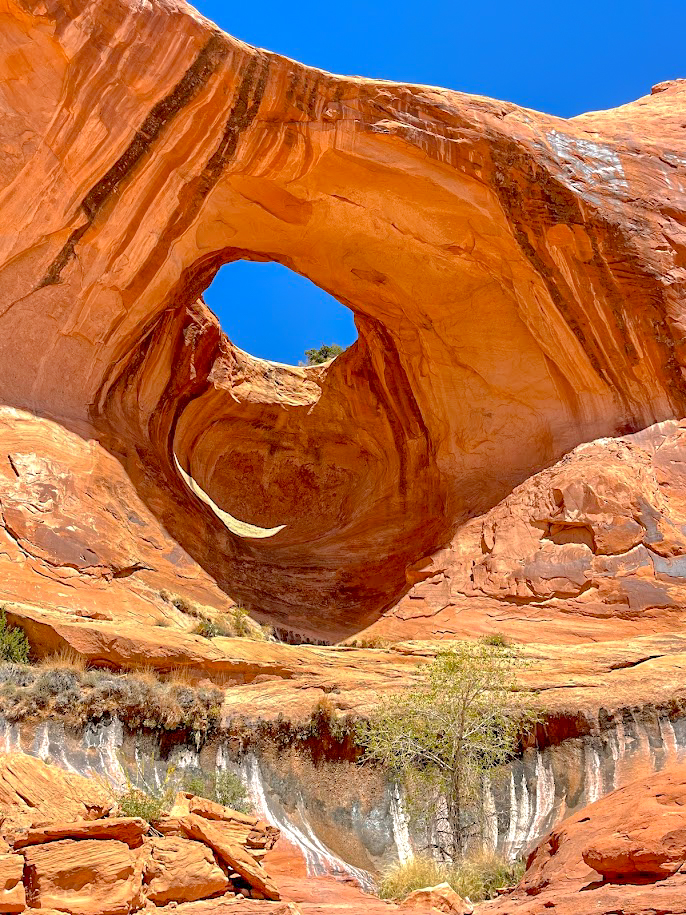 Bowtie Arch can be seen right before arriving at Corona Arch
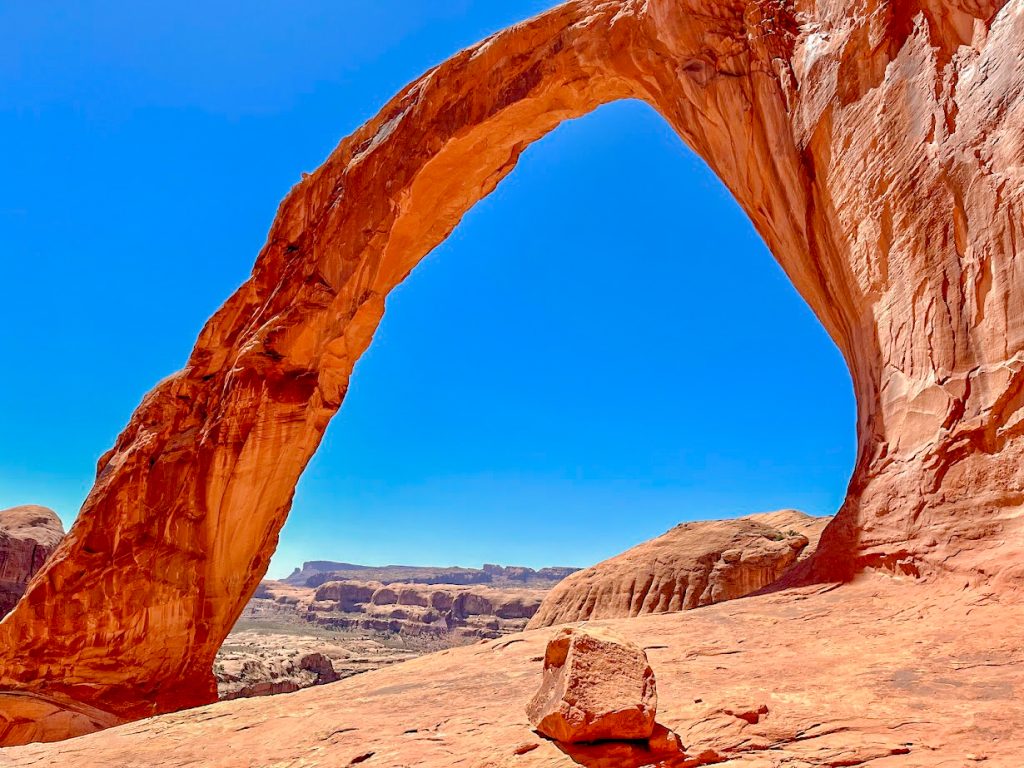 Corona Arch is another huge arch that needs to be seen on your trip to Moab
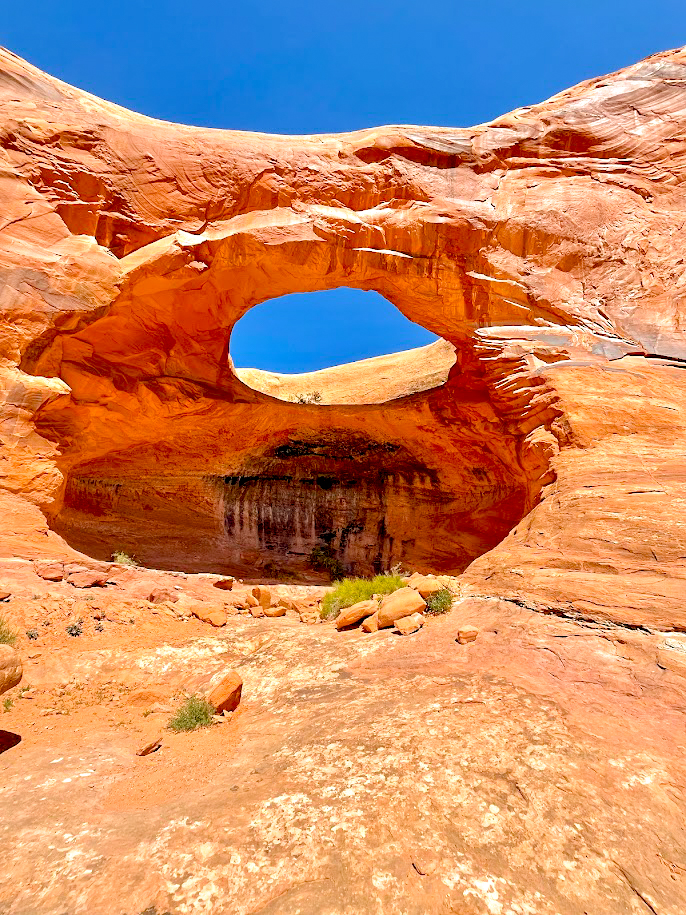 Pinto Arch is also worth checking out while you are hiking the trail to Corona Arch
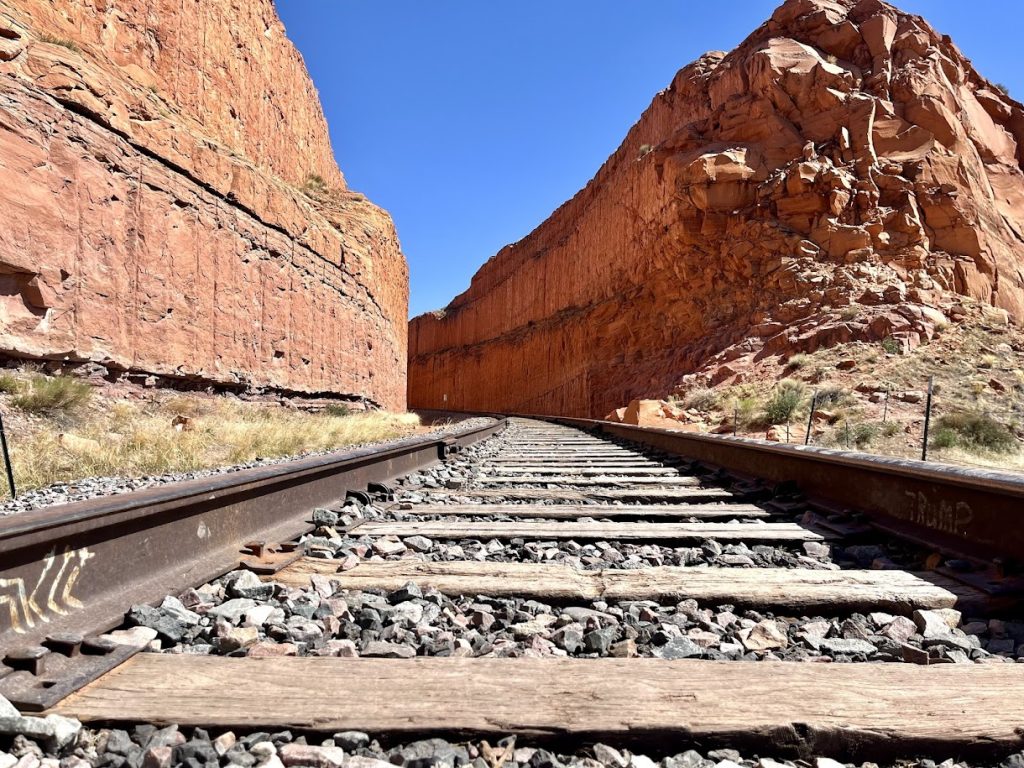 On your way to the arches, you will also pass this railroad track cut straight into the sandstone
Canyonlands National Park
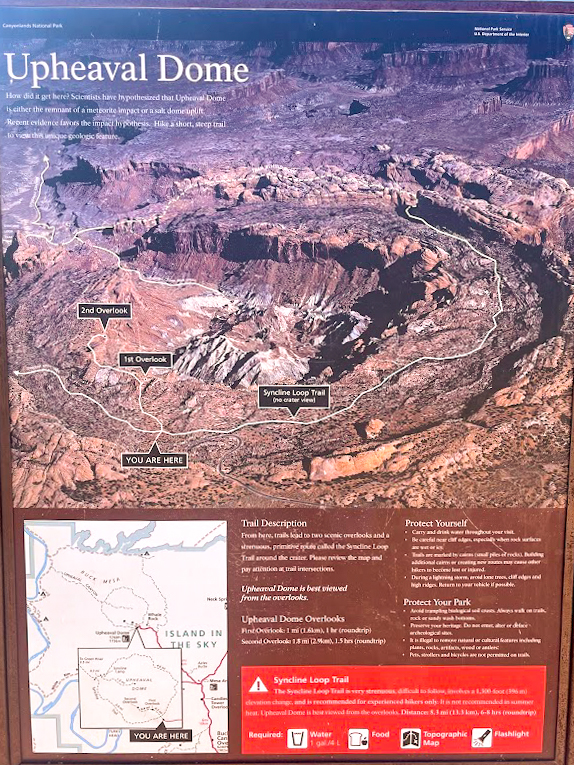
If you are still up for more adventuring, I recommend heading to the Island in the Sky portion of Canyonlands National Park. If this is your first visit to Canyonlands National Park, you should definitely stop at the Island in the Sky Visitors center and then see Mesa Arch and the Grand Viewpoint Overlook. I have visited this area of Canyonlands National Park before and saw those sites previously, so this time I hiked to see Upheaval Dome. I did not have time to hike this trailhead the last time I visited Canyonlands, so I made sure to take this hike on this visit to Moab.
There is still scientific debate about how Upheaval Dome was formed. Some scientists believe it was formed by a meteorite impact, and others think it could have been a salt dome uplift. Apparently, recent research leans towards the impact theory, but it is fascinating that this nearly 3-miles across crater is still not fully understood. The crater has also been photographed from the International Space Station, which is also really neat. You can read more about the Upheaval Dome on the National Park Service website here and you can find out additional information on the Island in the Sky District here.
If you have never been to Canyonlands, you might want to take some extra time in the park to explore and watch the sunset. Since I had been there previously, I decided to visit another park that I had heard a lot about for sunset. Just a few miles from the entrance to Canyonland’s Island in the Sky District is the entrance to Dead Horse Point State Park. This is where I headed to view the sunset.
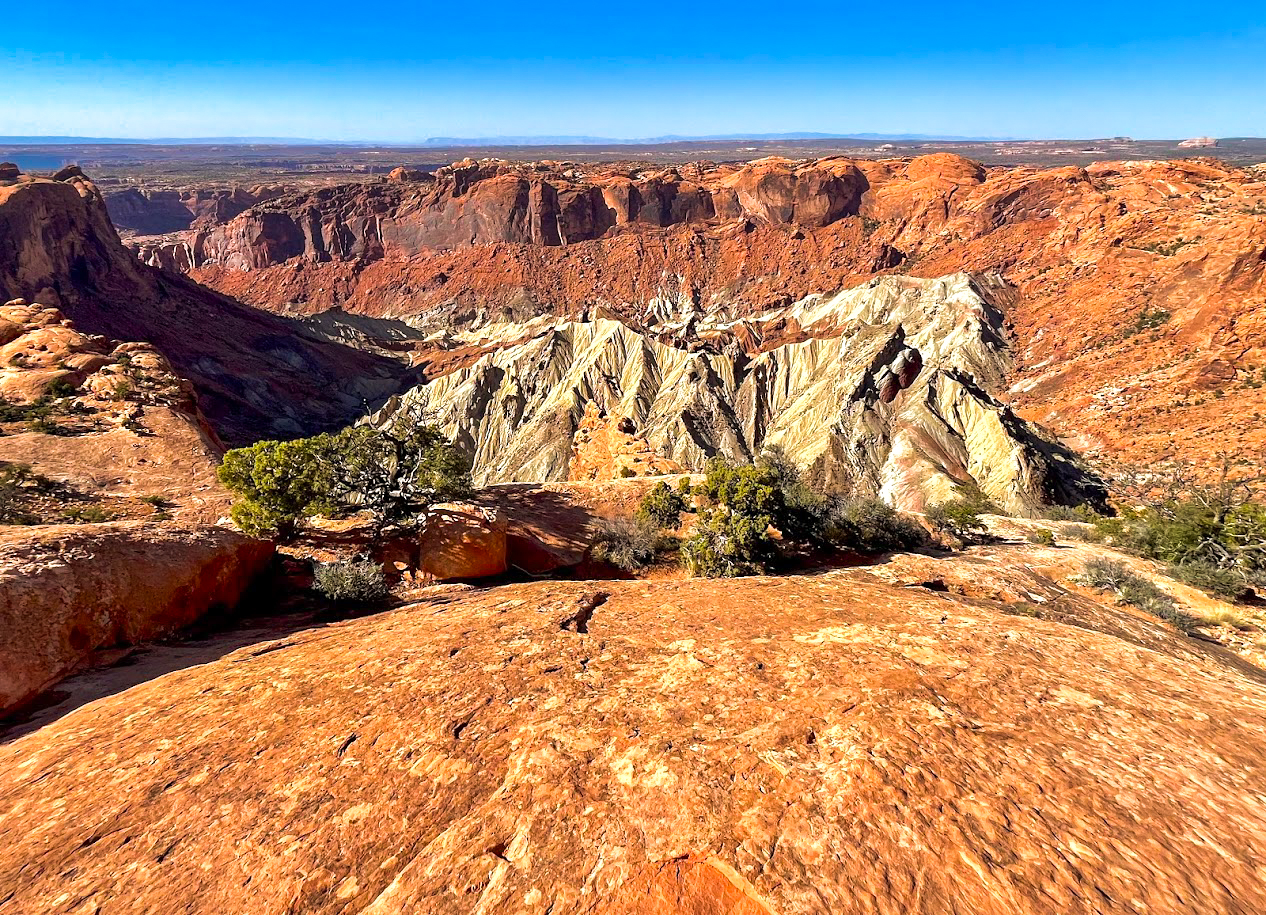 Looking down into the strange landscape of Upheaval Dome
Dead Horse Point State Park
Prior to visiting Moab on this trip, I had heard that Dead Horse Point State Park was pretty incredible especially for sunset. By the time I visited all of the previously mentioned sites, I arrived at Dead Horse Point State Park about an hour and a half before sunset. The ranger at the entry gate suggested I visit the Dead Horse Point Overlook and then go hike out to Big Horn Overlook for the sunset. Dead Horse Overlook provides very amazing views of the Colorado River to the south and the La Sal Mountains to the east.
After checking out this viewpoint, I went to the visitor center to park at the trailhead that leads to Big Horn Overlook. Since I was hiking to this overlook for sunset, I brought a headlamp and flashlight to make my way back to my car in the dark. The Big Horn Overlook trail is approximately three miles roundtrip but worth the hike. There was only one other person on the trail while I was there, so I had the overlook almost to myself.
The views from this overlook were also breathtaking and made me glad I made this hike. There are also some very neat deep potholes in the rocks of the overlook. It was really interesting to see these deep potholes and think about how potholes in the sandstone like these were what ultimately formed the massive Double Arch in Arches National Park. I would absolutely go back to this area for another sunset and recommend visiting this state park in Moab. You can find out more about hiking trails in Dead Horse Point State Park here.
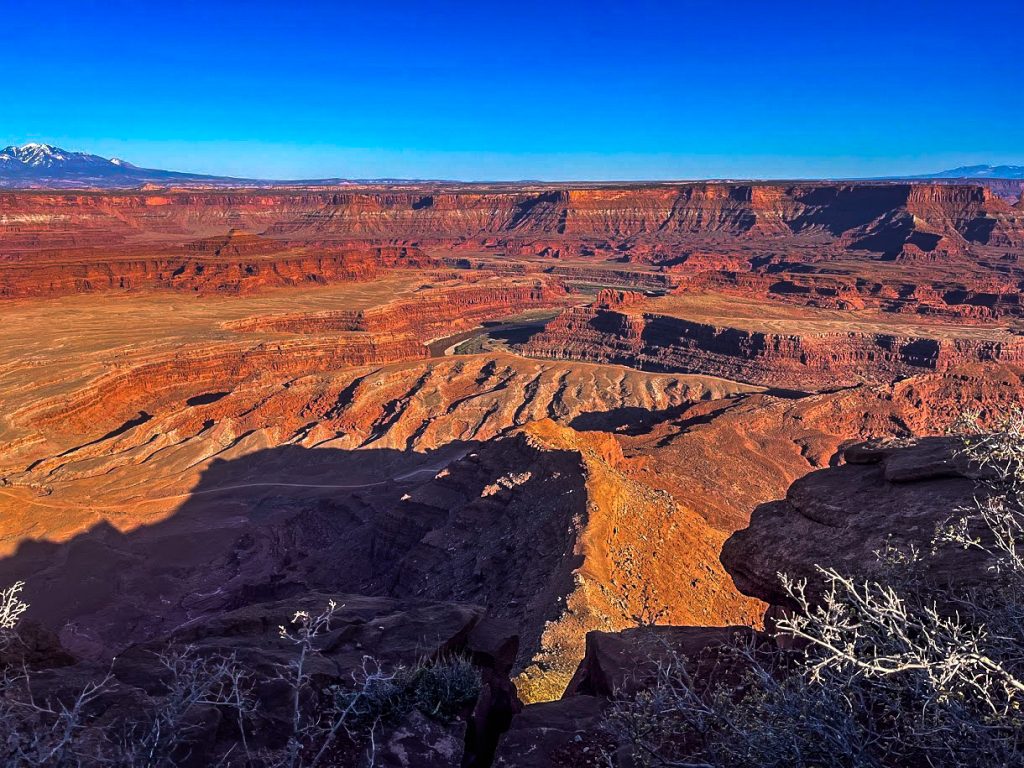 Looking at the Colorado River from Dead Horse Point
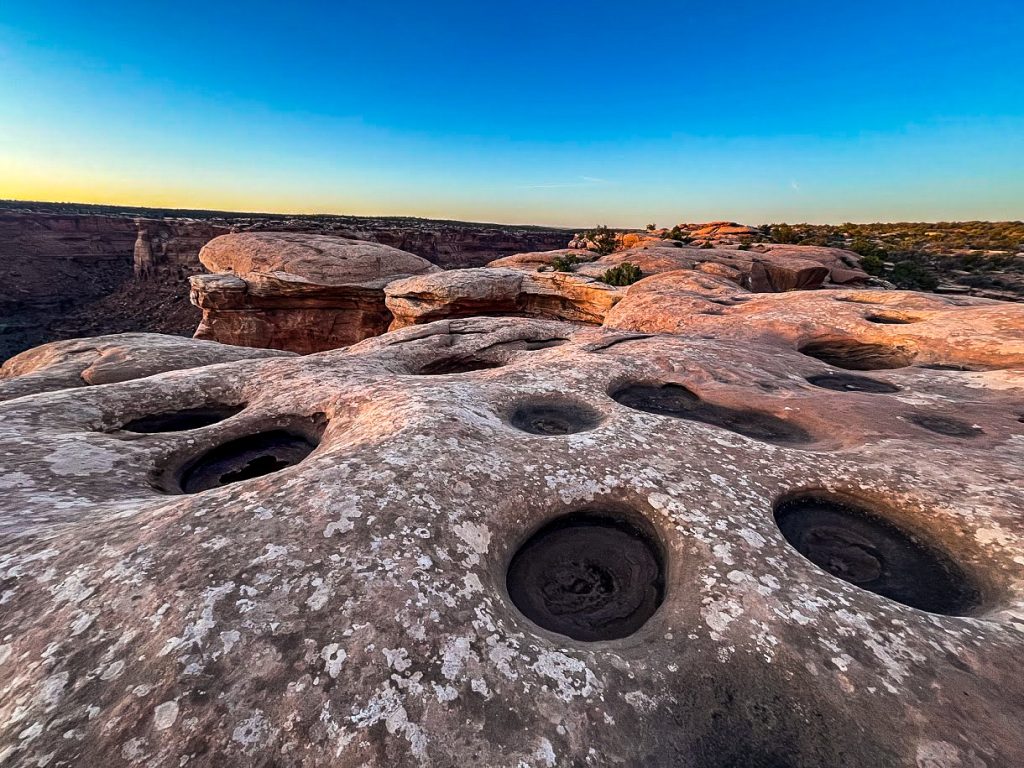 Some of the really neat potholes at the end of Big Horn Overlook Trail
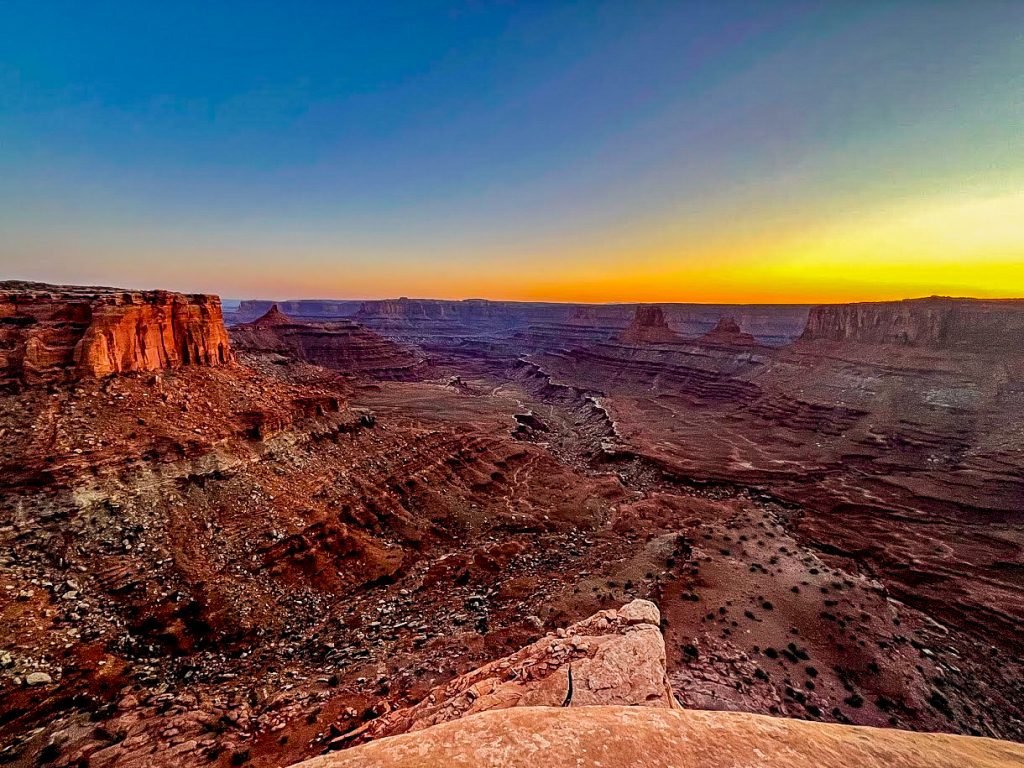 Catching the desert sunset from Big Horn Overlook
Check out the Birthing Scene Petroglyphs, Moonflower Panel, and Courthouse Wash Rock Art before heading out of town
Before departing Moab, you should also allocate some time to check out additional petroglyphs in the area. These are all close to the road so you can quickly visit them before departing from Moab.
Birthing Scene Petroglyphs
The Birthing Scene Petroglyphs are 6.2 miles outside of Moab on Kane Creek Boulevard, which is a well-maintained dirt road. I was able to reach these petroglyphs in a 2-wheel drive vehicle with no problems. The Birthing Scene Panel is one scene on a large boulder that features Native American petroglyphs on all four sides. The Birthing Scene is a unique and famous petroglyph that is said to depict a figure giving birth feet first. You will have to decide what it looks like to you and if you think it looks like a birth scene. Be sure to work your way all the way around the boulder as there are additional pictographs on each side of the rock.
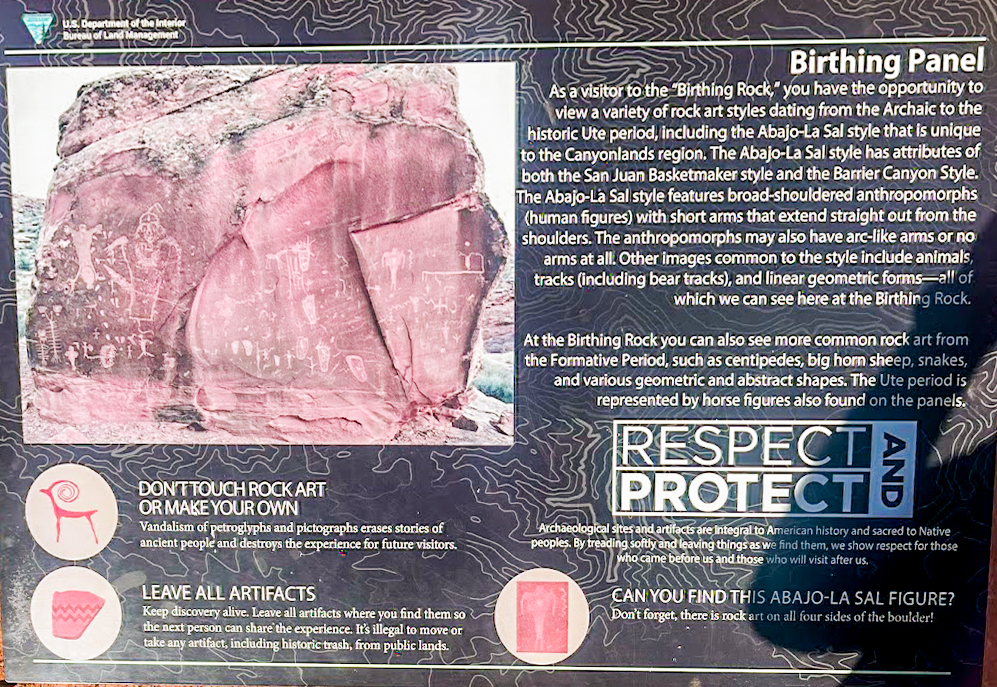 The Bureau of Land Management interpretive sign at the Birthing Scene Panel
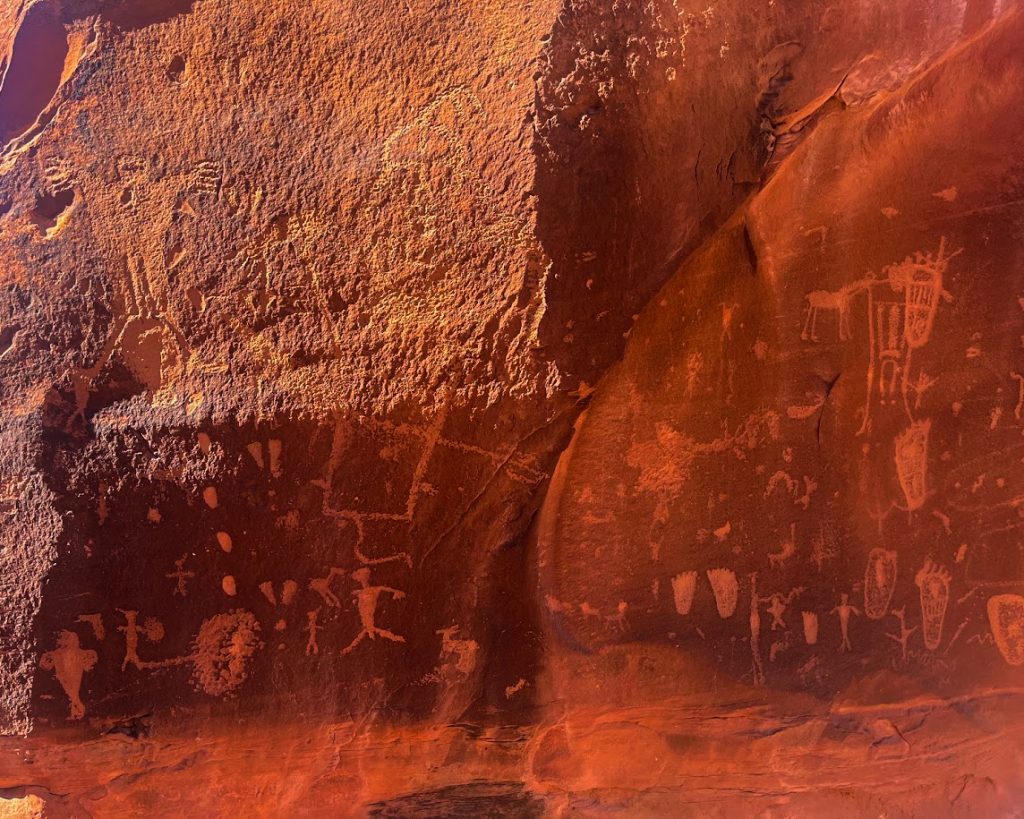 Some of the petroglyphs on the Birthing Scene Panel. The “birthing scene” can be seen in the upper left.
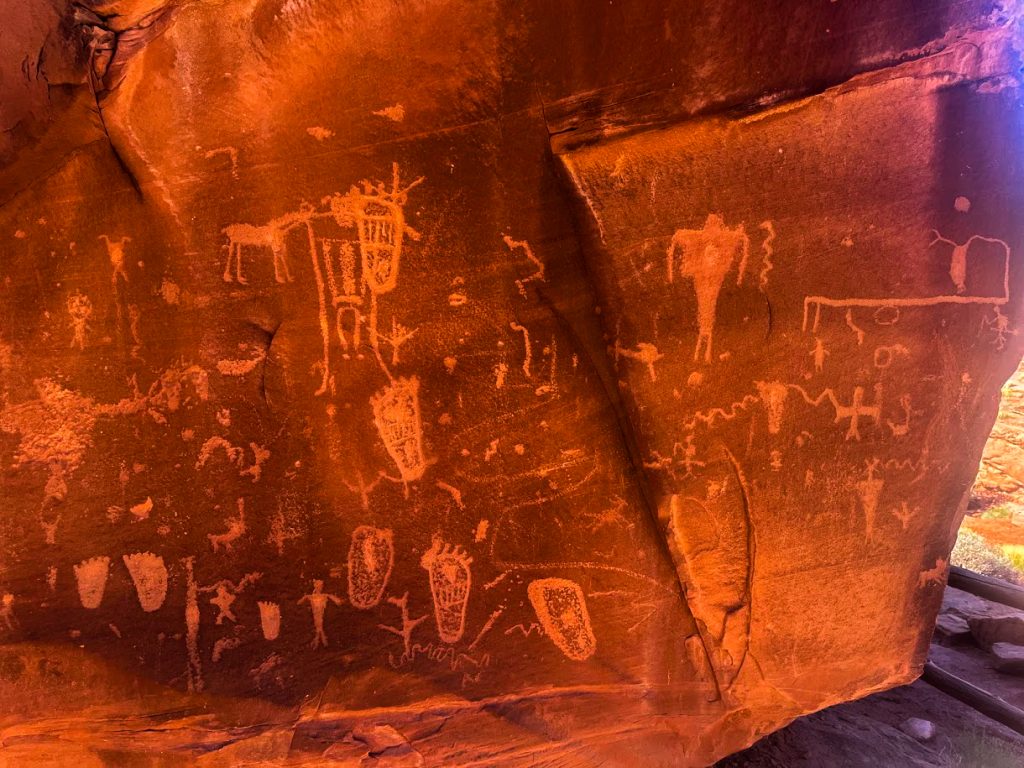 More rock art on another part of the boulder
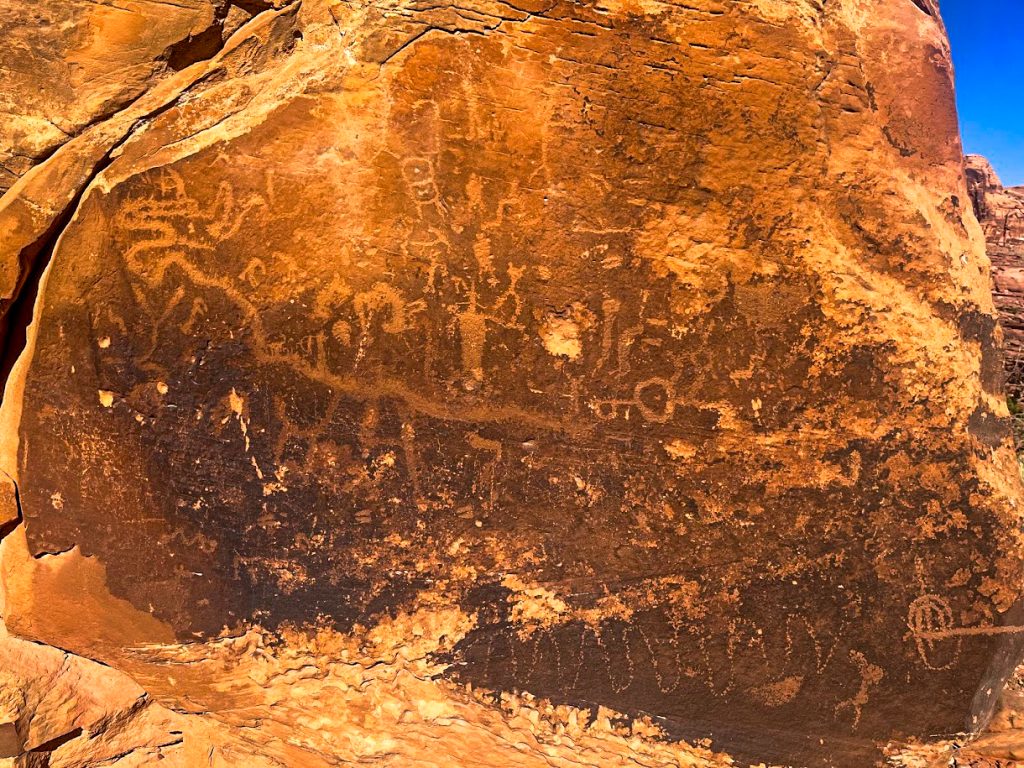 Additional rock art found on the other side of the boulder
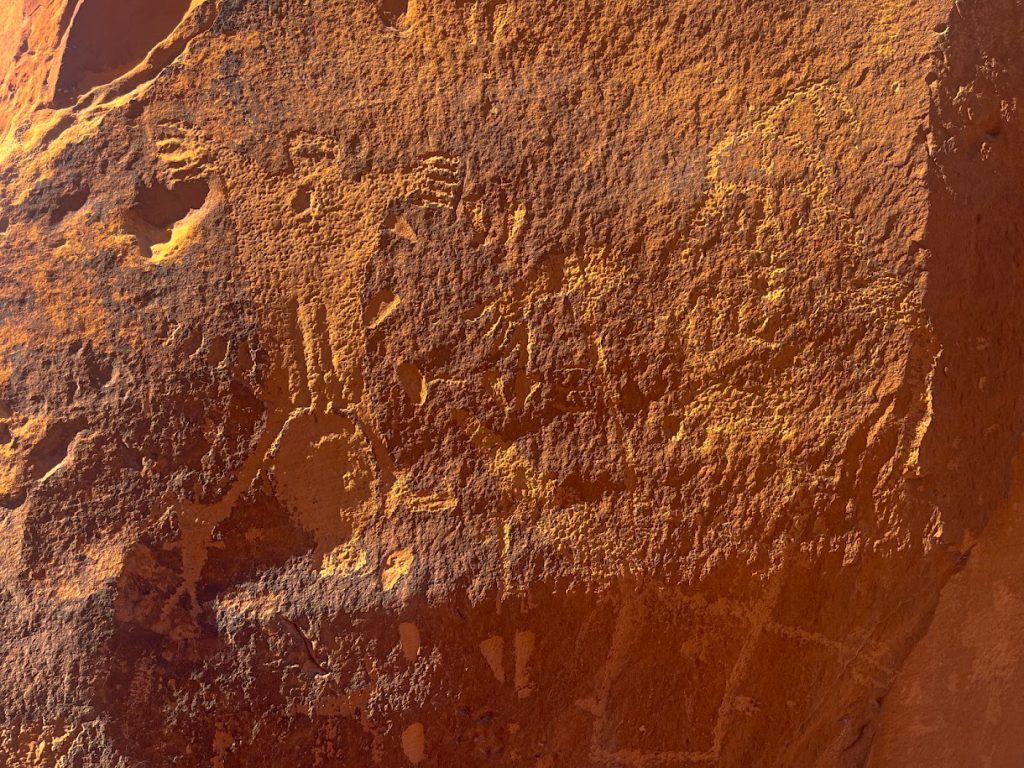 A close up of the “birthing scene” petroglyph
Moonflower Panel
On your way back from the Birthing Scene petroglyphs, you can also visit the Moonflower Panel. You can also discover this petroglyph panel on Kane Creek Boulevard at the Moonflower Canyon Recreation Area parking lot. You can simply get out of your vehicle and take a look at these rock art panels before continuing on your way.
 The interpretive sign for the Moonflower Panel Petroglyphs
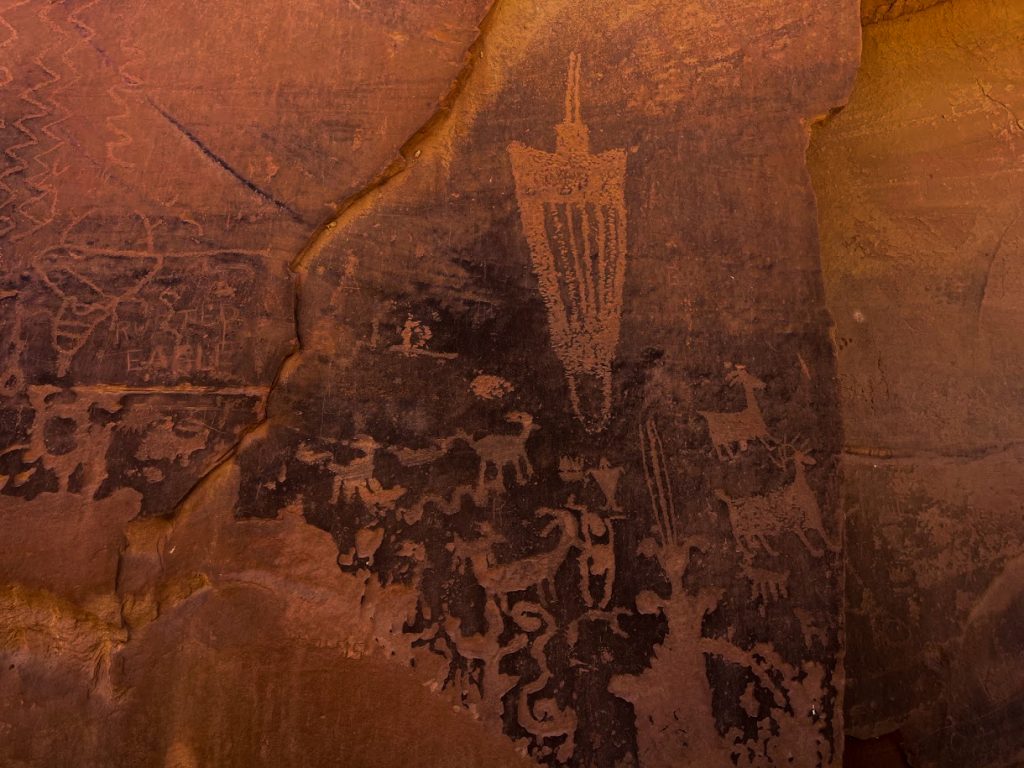 One of the best shots I could get of these petroglyphs that did not heavily feature modern vandalism
Courthouse Wash Pictographs and Petroglyphs
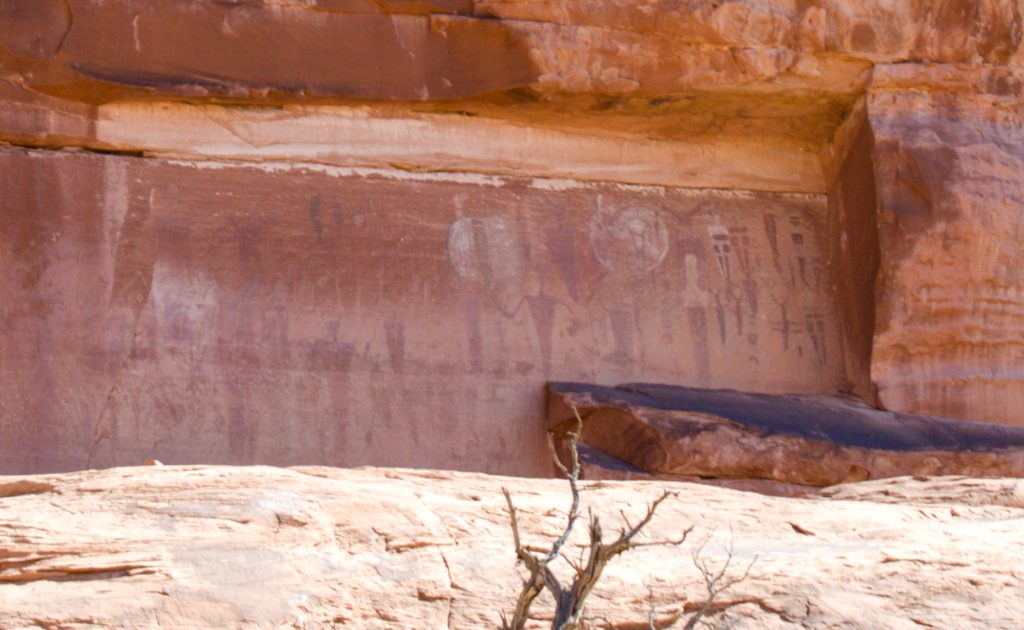
As you depart from Moab, I would also recommend making a quick stop at the Courthouse Wash Rock Art Panel. This rock art panel is just outside of Moab and just north of the Colorado River. The hike to this panel is less than a mile from the parking lot. You cannot get very close to these pictographs and petroglyphs, so a pair of binoculars comes in handy for viewing the panels. Archaeologists think the painted (pictographs) figures here were painted between 1,500 and 4,000 years ago. You can find more information about the Courthouse Wash rock art on the National Park Service website here.
If you go to Moab:
If you go to Moab, there are numerous options for camping, glamping, RV parks, and hotels. You can read more about the hotels I have stayed at in my post here. Keep in mind that most lodging options fill up during the peak summer months in Moab. The summer heat is also quite hot, so I would recommend planning your visit in the spring or late fall. For this trip, I visited in early April and found the weather to be amazing and there was still a lot of hotel availability. You can also check hotel availability for your stay on Booking.com below.